Pay a Fee
Upon reviewing your submitted filing bundle, the clerk
may require that you pay an additional fee to prevent the filing bundle
from being rejected.
Select History
under Main Pages in the navigation pane.
In some
court systems, a connection must grant you permission to view their filing
history. If a connection hasn't granted you this permission, that connection's
filing bundles are not listed.
My
Organization's History - filings bundles you submitted
on behalf of an organization. This option is available only if
you are a member of a TrueFiling organization, and the Organization
Administrator has granted you permission to view its history.
Click 
 here
to learn how the Administrator will configure your access to your
organization's history. See Organizations
in TrueFiling to learn more.
Select the button to locate
the desired filing history - for example, My Network's History. The
search date range defaults to the last 30 days.
Specify a different date
range, if needed. See Specify a
Date Range for detailed instructions.
Click Search.
The filing history specified is returned in Filing
View by default.
See History
Page Display Options and Re-order
the Grid to learn how to control how the bundles and filings are displayed.
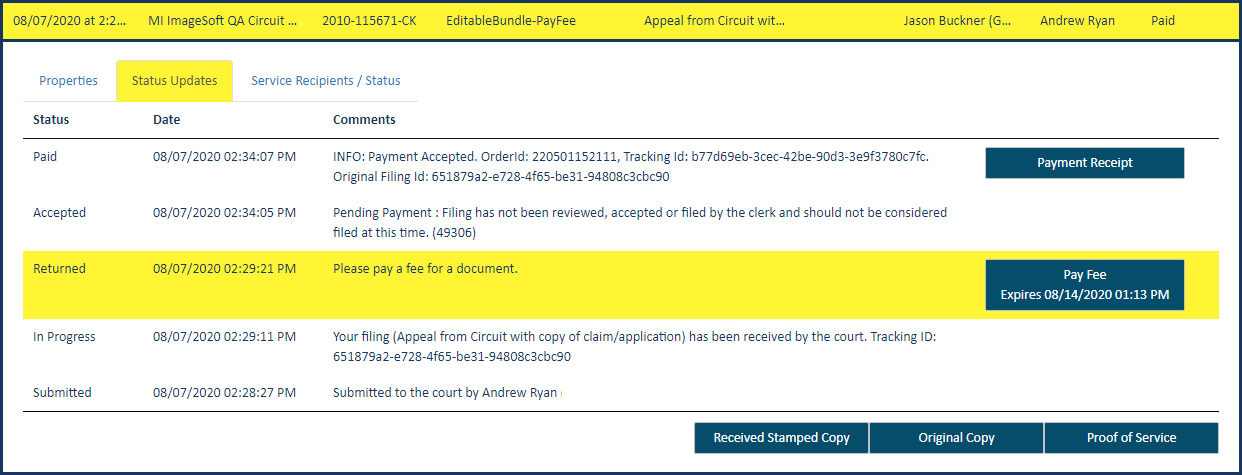
Locate the filing document
that has been returned. It will be highlighted in yellow.
If you're in Bundle View, the line item for the
bundle in which the filing document resides is highlighted. Click the
bundle to expand and display the document that's been returned. That document
line item is also highlighted.
Click the filing document
to expand.
Select the Status
Updates tab (also highlighted).
A line item with a status of Returned
is listed and highlighted. A Pay Fee
button is available in that line item, along with any explanatory comment
added by the clerk.
The action button includes an expiration date. The
action must be performed by that date, or the button will become disabled.
Click the Pay
Fee button. The Bundle Assembly page is displayed.

Select the Filer.
The Filing Name defaults to Returned Filing - Additional
Payment. This name cannot be edited. The Payment Type similarly defaults
to Returned Filing - Additional Payment - Filer Provided Fee.
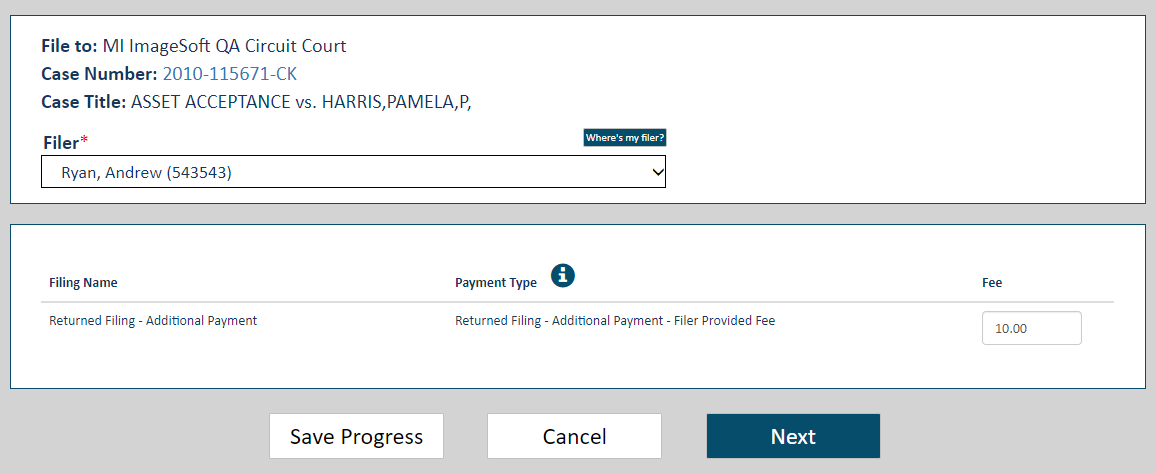
When the clerk returns the filing document, they may specify the fee amount
required. If this occurs, the Fee
field will contain that amount.
Note: The Fee
field can be edited, even if the court specified the fee required.
If no fee was specified in the Returned document comments,
the filer must input the amount to pay.
Click Next
to proceed with the submission process.
Your filing bundle will be validated. See Filing
and Bundle Validation to view possible validation errors.
If no errors are present, this dialog is displayed.
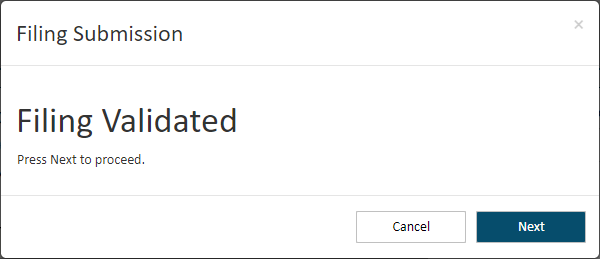
Click Next
to proceed. The Checkout dialog is displayed.
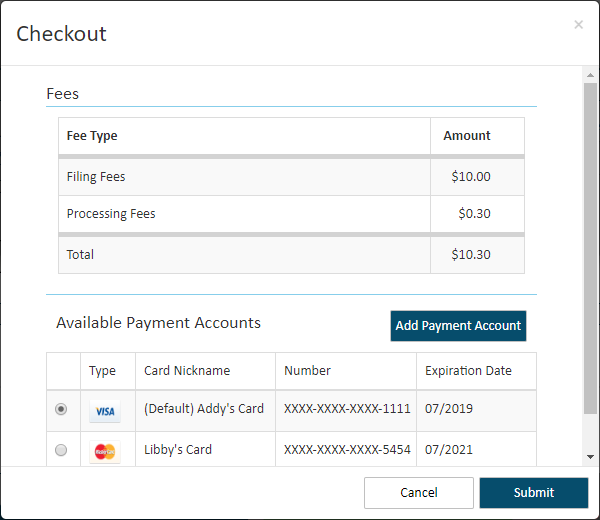
Select the appropriate
Payment Account. If no payment
accounts are listed, click the Add
Payment Account button. Learn how to add
a payment account.
Depending on court rules, a payment account can be
a credit card, escrow account, or Inter Agency Transfer payment account.
Escrow and Inter Agency Transfer accounts must be authorized by the court.
Refer to the Glossary for more
information.
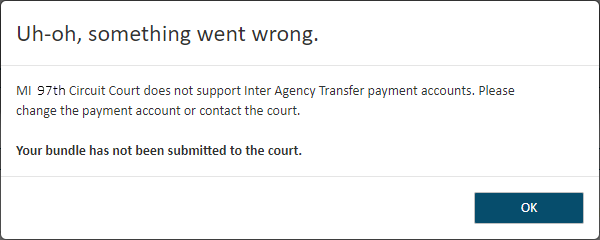
If you select an Inter Agency Transfer account, the
court must be configured to support that payment type. If it's not, 
 an
error dialog is displayed after you click the Submit button on the Checkout dialog.
Click OK to close the dialog.
You'll be returned to the Bundle Assembly page.
Click Submit
on the Checkout dialog.
When your filings are successfully submitted, this
dialog is displayed.

Click OK
to close the dialog.
The History page is displayed. The payment is listed
on My History and / or My Network's History as a separate bundle;
it is not included with the original (parent) bundle. If the required
action was completed, the parent bundle is no longer highlighted.
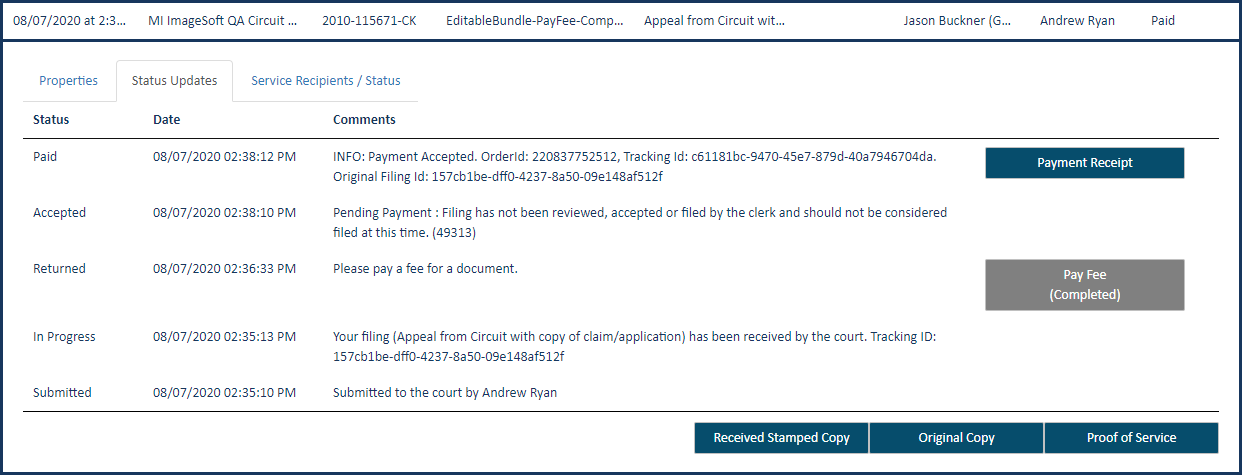
The Pay Fee
action button is disabled, and the action is identified as Completed.
The payment is processed through the court system,
wherein it is either rejected or accepted. Upon acceptance, it will be
stamped as Paid.
The fee payment is represented as a separate line item
on the History page.
Once paid, a payment receipt can be downloaded. Access
the payment filing bundle on the History page and download
the receipt.
 here
to learn how the Administrator will configure your access to your
organization's history. See Organizations
in TrueFiling to learn more.


