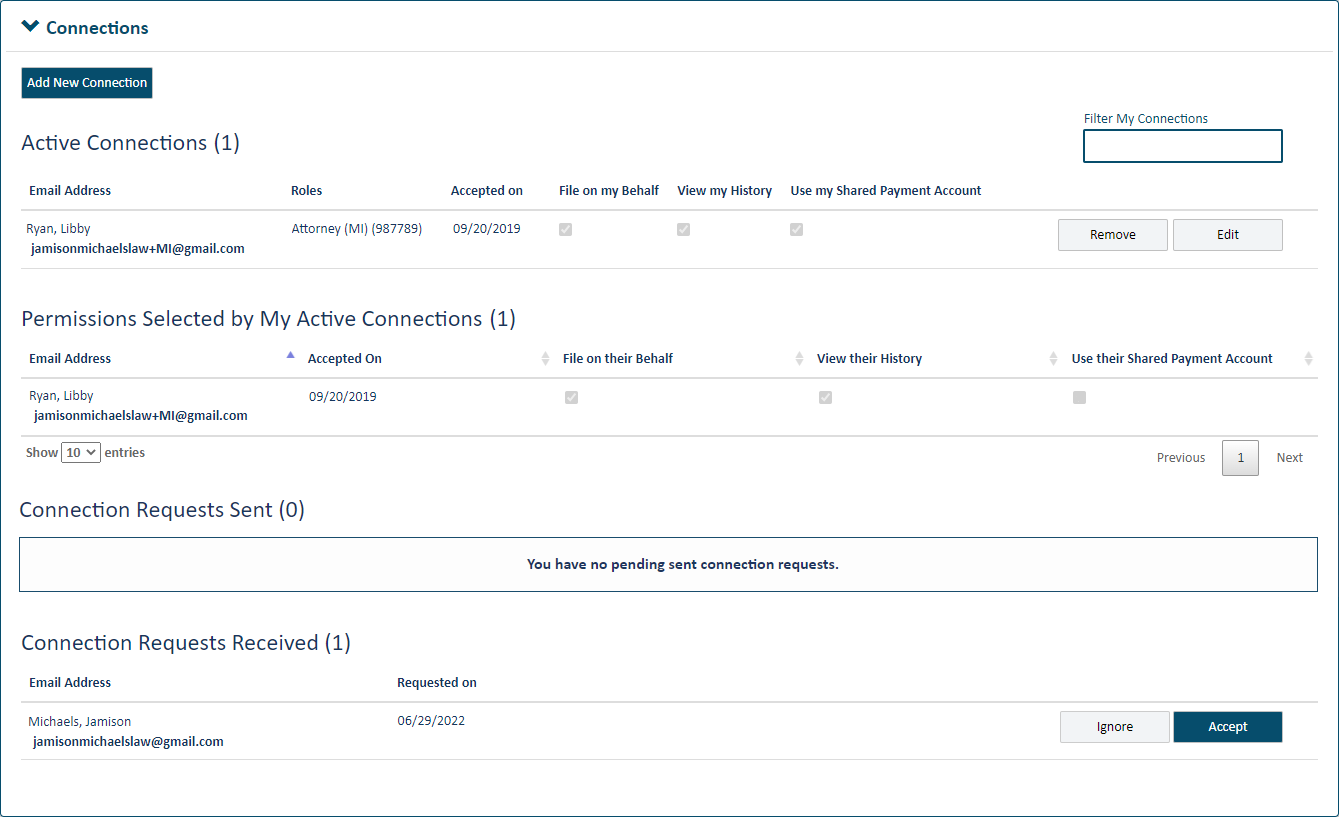
The court system determines the process you'll use to add a connection to your network. In some court systems, when adding a new connection, permission to file on your behalf, view your filing history, and use your shared payment accounts are granted by default. See Connections with Default Permissions for details.
You can connect only with registered TrueFiling users who have confirmed their email address. See Sign up for TrueFiling for details on email confirmation.
When you ask a TrueFiling user to join your connection network, the next time they log in to TrueFiling, a Connection Request notification will display in the top menu bar. They'll also receive an email letting them know someone wants to connect.
To invite a TrueFiling user to join your connection network:
Select Settings in the navigation pane.
On the Settings page, expand the Connections pane.

Click Add New Connection.
Some courts
may allow only users whose TrueFiling  user
role is Attorney to send a connection request. If
you're filing in such a court, and your user role is not Attorney, the
Add New Connection button is not
visible.
This dialog will display. Read it carefully and be certain you understand how TrueFiling connections work. See TrueFiling Connections for more information.
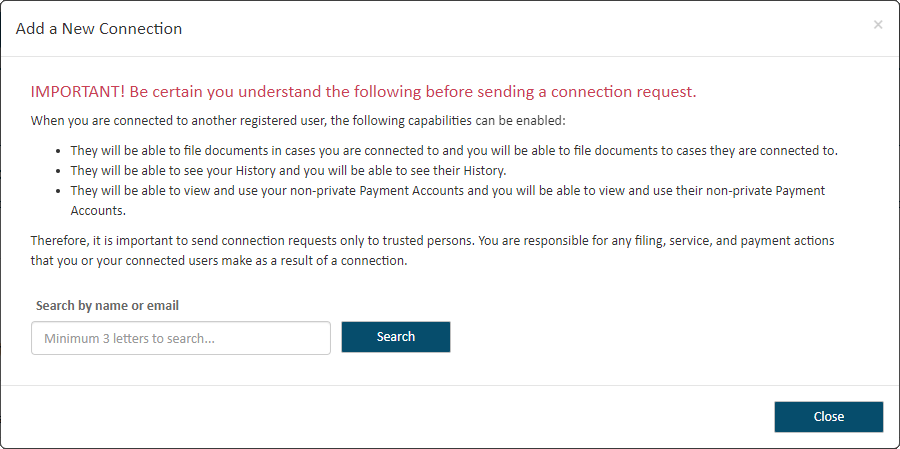
If you don't want to continue to add the connection, click Close.
To continue, input the name or email address of the person you want to add as a connection in the Search field.
A court system may be configured to accept only an exact and complete email address when performing the search for your potential connection. If no registered TrueFiling user has the email address you entered, an error message is displayed, and no connection request is sent. Please confirm the email address you entered is correct.
Click Search.
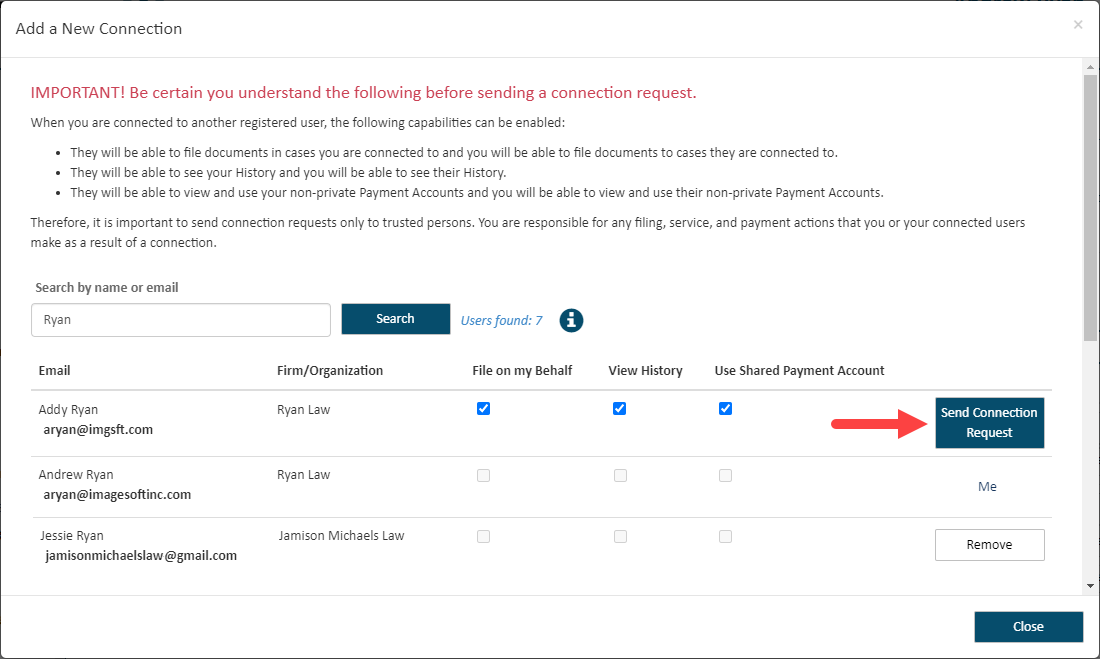
The entries listed will include TrueFiling users you're already connected to and those you can connect to. A message will display if no matching entries are found.
If the user you want to connect with isn't listed,
click the information icon ![]() .
Follow the instructions to verify they have confirmed their email address
through the TrueFiling confirmation email they received.
.
Follow the instructions to verify they have confirmed their email address
through the TrueFiling confirmation email they received.
Locate the person you want to add as a connection.
If more than five results are returned, a scroll bar is placed on the right edge of the dialog. Scroll through the results to locate the person you want to add.
Select the permissions to grant to the connection. You can allow them to:
File on your behalf
View your filing history
Use a payment account you have chosen to share
Click the Send Connection Request button beside the person to add. The connection request email will be sent. The potential connection will see a Connection Request notice when they log in to TrueFiling.
Note: If you clicked Send Connection Request in error, you can click the Withdraw button. The Connection Request notice won't display when the user logs in; however, the request email will still be sent to them.
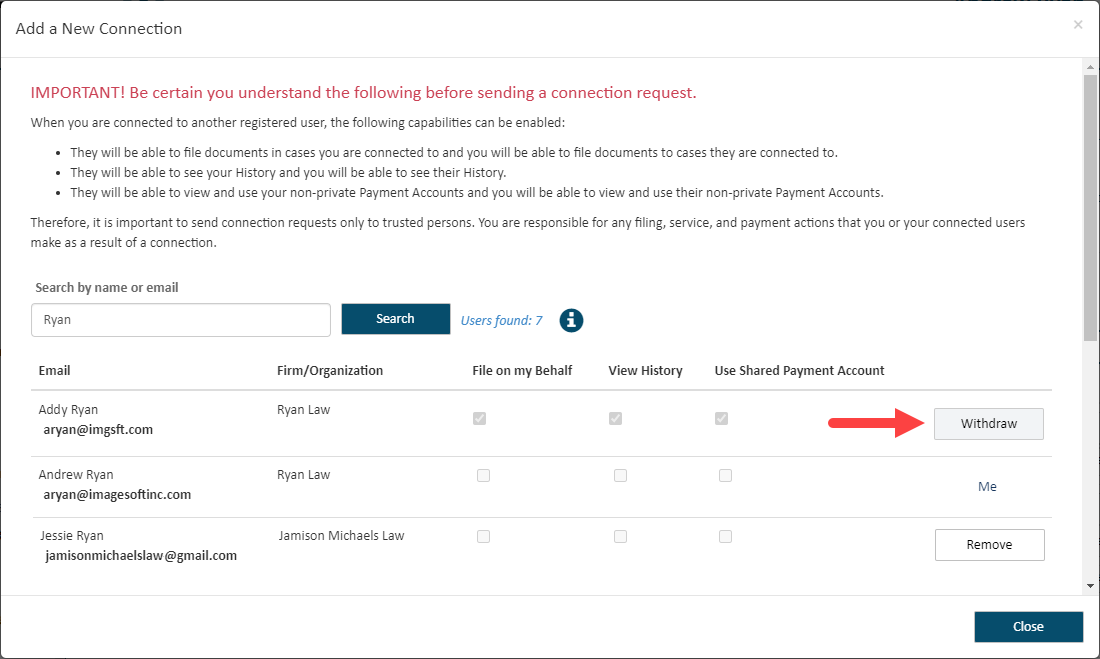
Click Close when you're finished. Your potential connection is listed in the Connection Requests Sent section of the Connections pane.
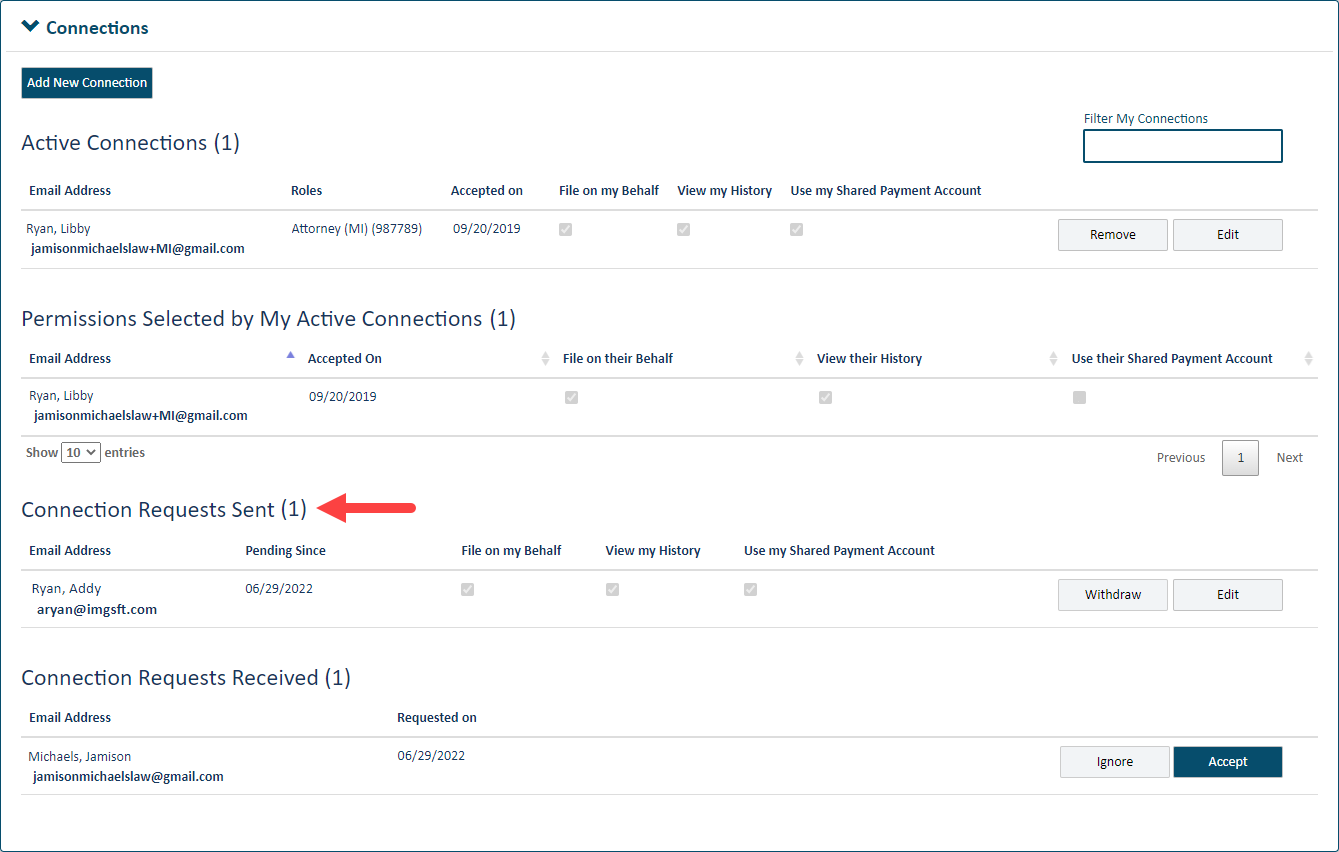
To become part of your connection network, they MUST log in to TrueFiling and accept your request. They won't be an active connection until they accept the request.
As part of the connection acceptance process, they will specify which permissions they want to grant to you. See Accept a Connection Request and Specify Permissions for details.
Once they accept, their name will be added to your list of Active Connections.