Replace a Document
Upon reviewing your submitted filing bundle, the clerk may require that you replace a document in the bundle. Returning a document allows the clerk to obtain the correct and appropriate document instead of rejecting the entire filing bundle. The clerk will send a separate Returned notification for each document that must be replaced.
The clerk may include a comment or details on the required filing document when the document is returned through TrueFiling.
Select History
under Main Pages in the navigation pane.
In some
court systems, a connection must grant you permission to view their filing
history. If a connection hasn't granted you this permission, that connection's
filing bundles are not listed.
My
Organization's History - filings bundles you submitted
on behalf of an organization. This option is available only if
you are a member of a TrueFiling organization, and the Organization
Administrator has granted you permission to view its history.
Click 
 here
to learn how the Administrator will configure your access to your
organization's history. See Organizations
in TrueFiling to learn more.
Select the button to locate
the desired filing history - for example, My Network's History. The
search date range defaults to the last 30 days.
Specify a different date
range, if needed. See Specify a
Date Range for detailed instructions.
Click Search.
The filing history specified is returned in Filing
View by default.
See History
Page Display Options and Re-order
the Grid to learn how to control how the bundles and filings are displayed.
-
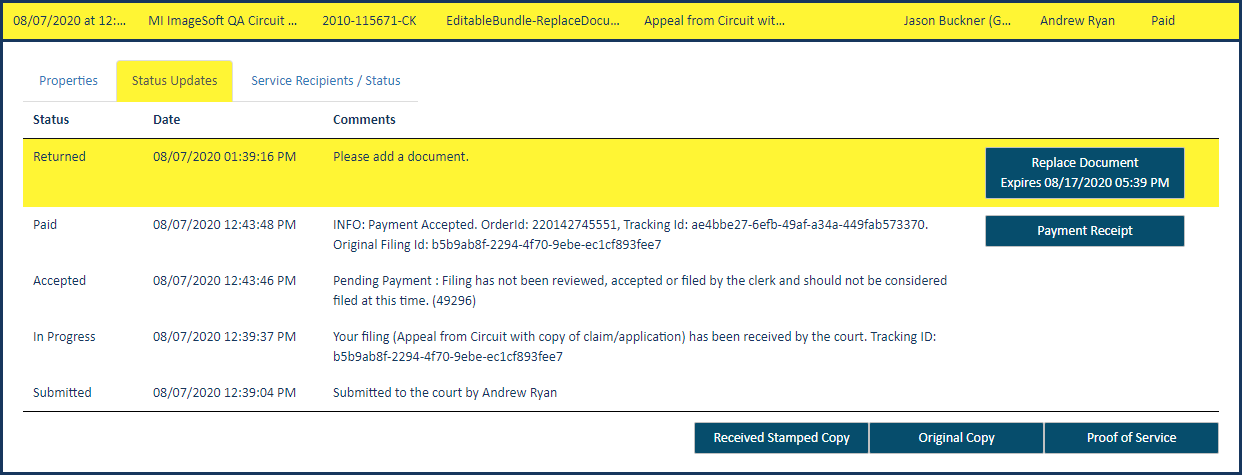
Locate the filing document that has been returned. It will be highlighted in yellow.
If you're in Bundle View, the line item for the bundle in which the filing document resides is highlighted. Click the bundle to expand and display the document that's been returned. That document line item is also highlighted.

-
Click the filing document to expand.
-
Select the Status Updates tab (also highlighted).
A line item with a status of Returned is listed and highlighted. A Replace Document button is available in that line item, along with any explanatory comment added by the clerk.
The action button includes an expiration date. The action must be performed by that date, or the button will become disabled.
-
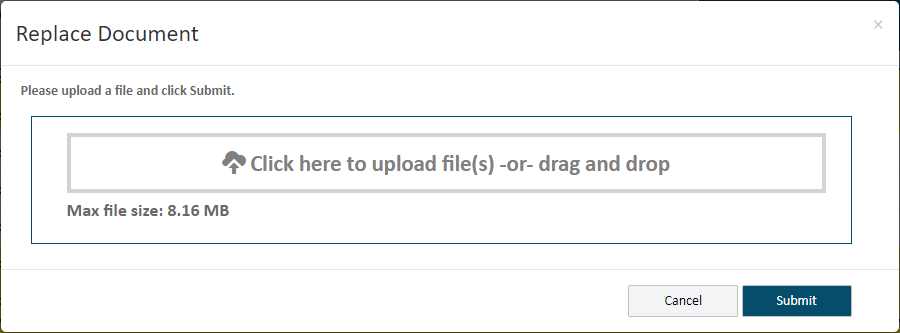
Click the Replace Document button to add the required filing document. The Replace Document dialog is displayed.

-
Click in the box.
-
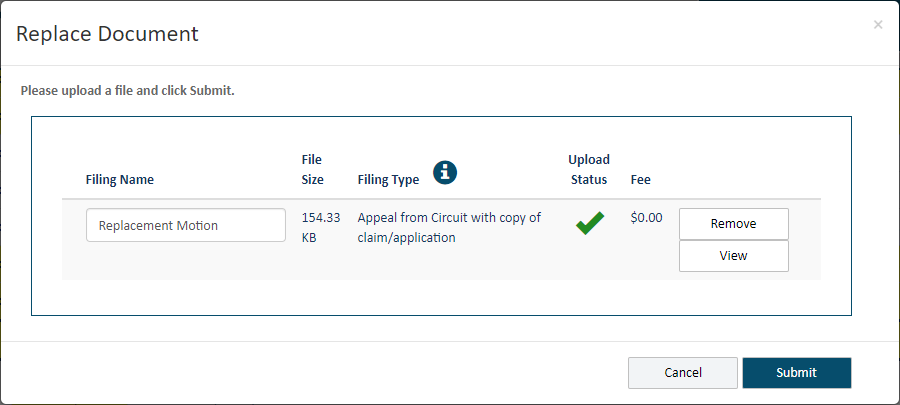
In the dialog displayed, navigate to and select the replacement filing document.
Using File Explorer, you an also drag and drop the document.

-
Click Submit. Note that there are no fees associated with replacing the filing document. As a result, the Checkout dialog is not displayed after the document is submitted.
When your filing document is successfully submitted, this dialog is displayed.

-
Click OK to proceed.
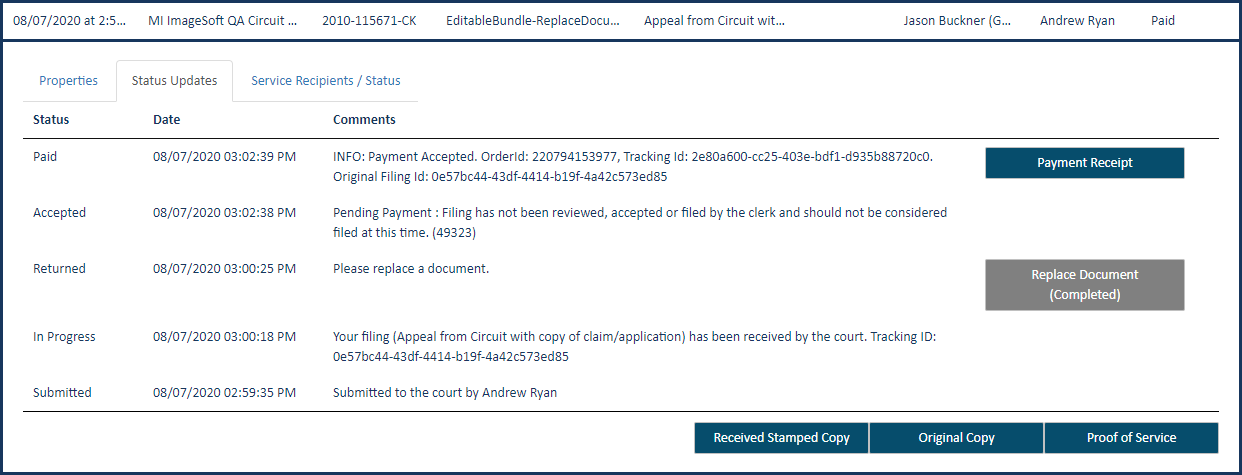
The History page is displayed. The replacement filing document is listed on My History and / or My Network's History as a separate bundle; it is not included with the original (parent) bundle. If the required action was completed, the parent bundle is no longer highlighted.

The Replace Document action button is disabled, and the action is identified as Completed.
The payment receipt available will reflect a zero-dollar filing.
The submitted filing document is processed through the court system, wherein the clerk will either reject or accept it. Upon acceptance, it will be stamped as Filed and become part of the official case record.
 here
to learn how the Administrator will configure your access to your
organization's history. See Organizations
in TrueFiling to learn more.


