Understanding the Signing Interface
When you open an envelope that requires your signature, the signing interface is launched.
Here, you can access each document in the envelope. You'll apply your signature, add any required annotations such as a stamp or text markups, and then save / complete / reject the documents.
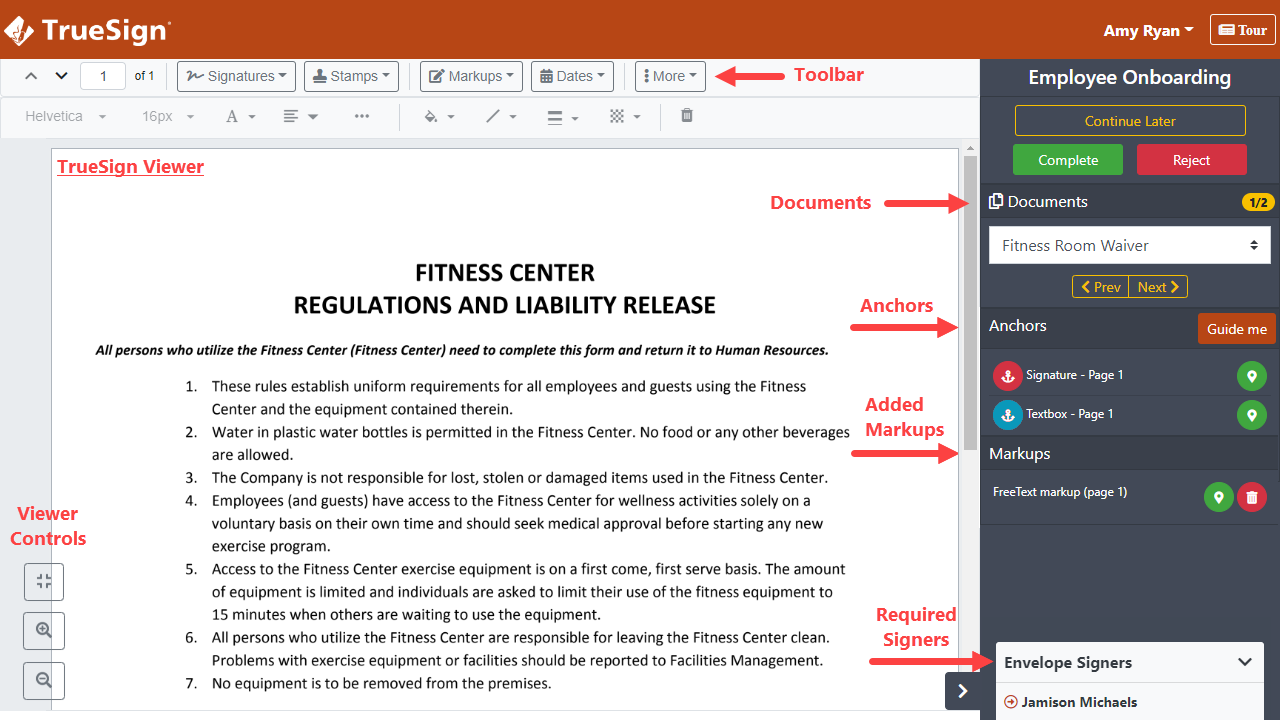
You'll use the toolbar to apply your signature, stamps, markups, and dates. You can also download a document, forward the envelope to another person, and manage how the the document is displayed in the Viewer. See The Signing Interface Toolbar for complete details.
When the signing interface is launched, the documents in the envelope are loaded and listed in the right sidebar. You can move between documents using the Prev and Next buttons, or you can click the arrows in the Documents field and select the document from the list presented.
The anchors that exist in the document are listed in the right sidebar. An anchor indicates where the signer will apply a signature or add written information and if the anchor is required (displays in red). Select the green location icon to move directly to an anchor within the document.
You can click the > icon beside the sidebar to collapse it.
You can control how the document is displayed in the viewer by using the Viewer Controls.
When the envelope was created, those persons required to sign were specified. The required signers are listed in the Envelope Signers section of the right sidebar. Click the field to display the required signers.