Accept a Connection Request and Specify Permissions
If a TrueFiling user has sent you a connection request, a Connection Request button will display in the menu bar.
The court system determines the process you'll use to accept a connection request.
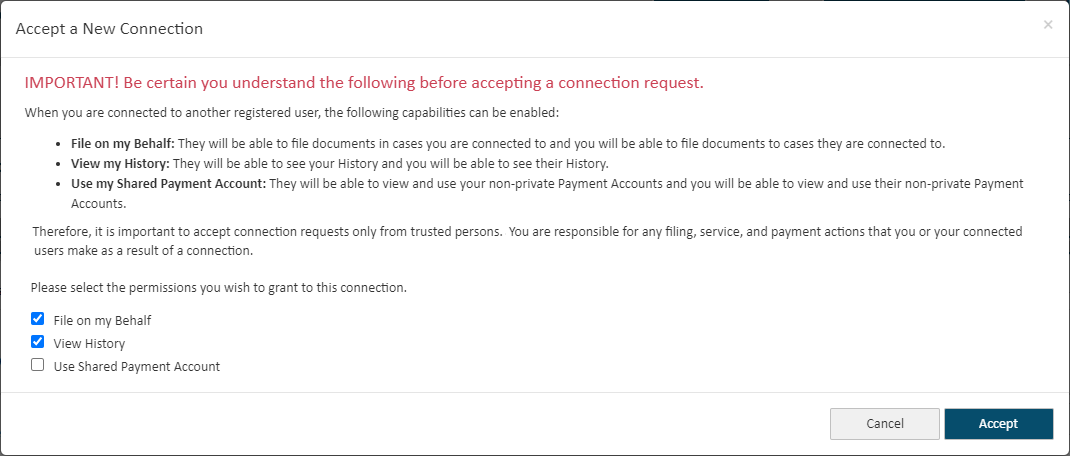
In some court systems, when accepting a connection request, you'll select which of these permissions to grant to your new connection:
- File on your behalf
- View your filing history
- Use payment accounts you've identified as Shared.
To accept a connection request and specify the permissions you wish to grant to your new connection:
- Click the Connection Request button; you're directed to the Connections page.

- Scroll to the Connection Requests Received section. This section lists connection requests you've received from other TrueFiling users.
- If you don't want to accept the request, click the Ignore button. The dialog will close, and the request will be removed from the Connections pane.
- Click Accept to accept the request.
This dialog will display. Read it carefully and be certain you understand how TrueFiling connections work. See TrueFiling Connections for more information.

If you don't want to accept the request, click Cancel. You'll be returned to the Connections pane where you can click Ignore to reject the request.
- If you want to add this person to your connection network, select the permissions to grant to them.
- Click Accept.
Your new connection will be listed in the Permissions Granted to My Active Connections and the Permissions Granted by My Active Connections sections of the Connections pane.